How to Choose the Best Photo for a Pet Portrait
The best lighting, angle, pose - everything you need to know!

The Eyes Have It !
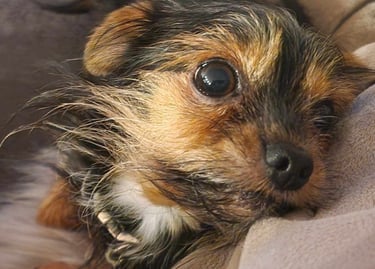
The eyes are where you and your pet connect and this is the one feature which it's really important to capture! I start most drawings with the eyes and in particular I love the reflections in the eyes, especially if they capture the person taking the photo - and that could be you! However small these details are, I try and recreate them in my drawings and it's much easier to do this if the eyes are sharp and in focus.
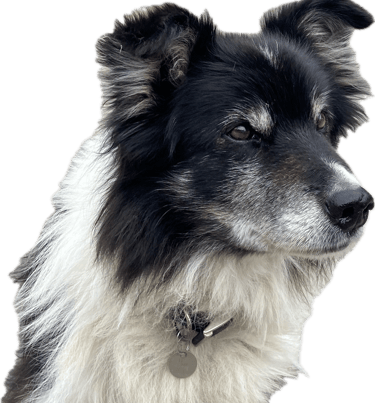
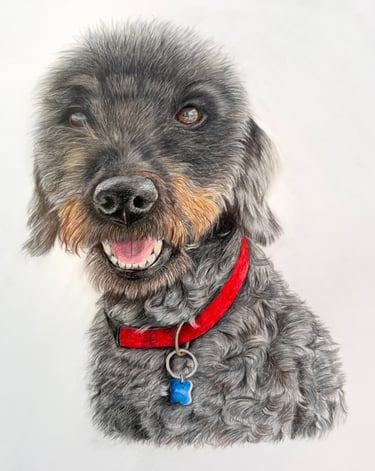
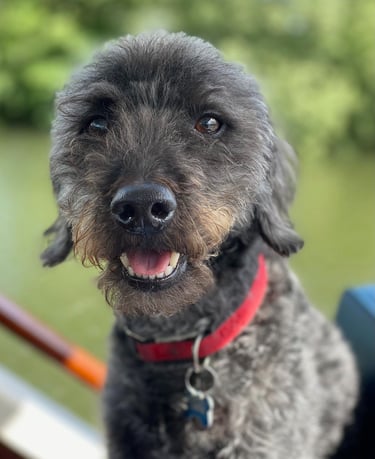
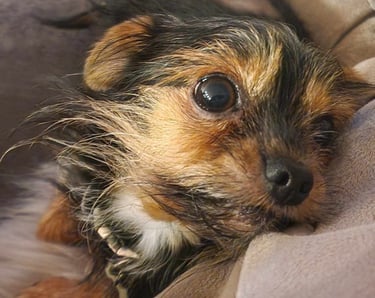
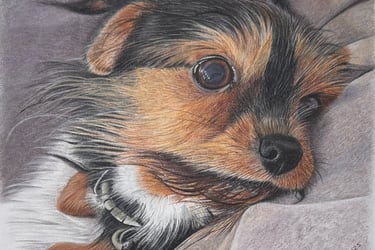
Before I talk about what makes a good photo, I thought I would explain what I do with the photos you send. Unless I'm including the background, the first thing I do is use my phone to remove it - and sometimes when I do that the ideal photo can look quite different when the background has been removed. That wasn't the case with this photo of gorgeous Ned, but it's a lovely photo and I thought I would use this as an example to explain something else.
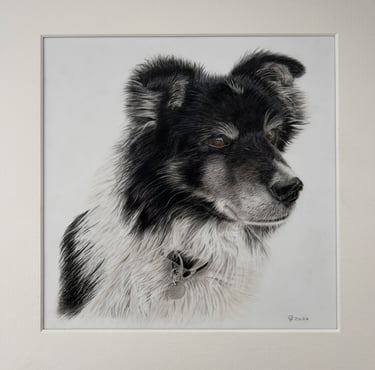
In this case the client had requested a 16" x 12" mount but when I put together a mock-up it just didn't look right, so I suggested that we change the mount to a square one and we opted for a 12" x 12" mount which worked much better (talhough I didn't manage to take a decent photo once it was finished!)

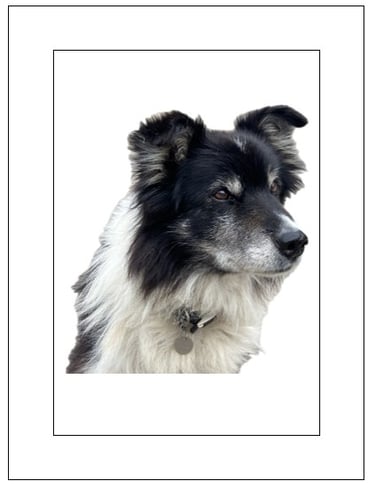
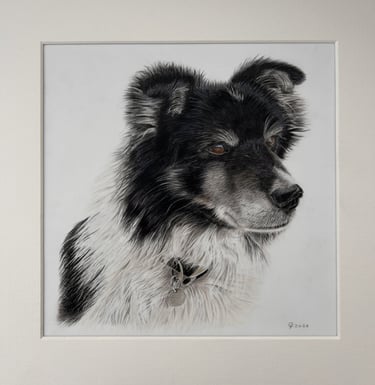
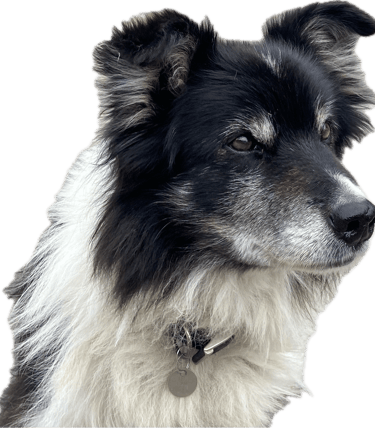
After removing the background, I assess how it looks in the chosen mount. At this point I may suggest swapping the mount for a square instead of a rectangle for instance.
Natural Daylight
Without a doubt, the best lighting is natural daylight. Please try and avoid strong sunlight because that can cast shadows - a bright but overcast day is perfect.

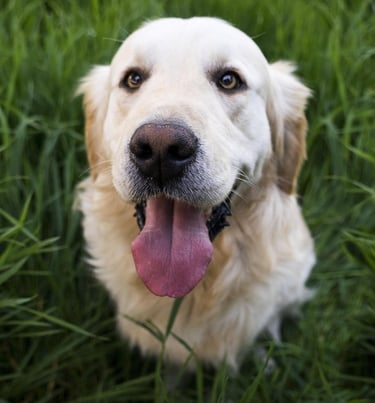
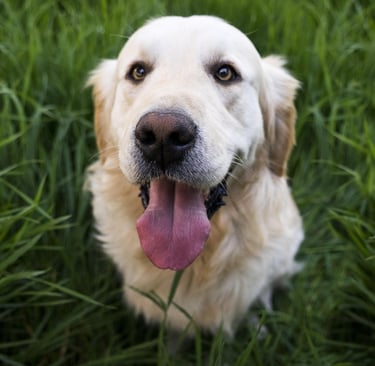
Be on Eye Level
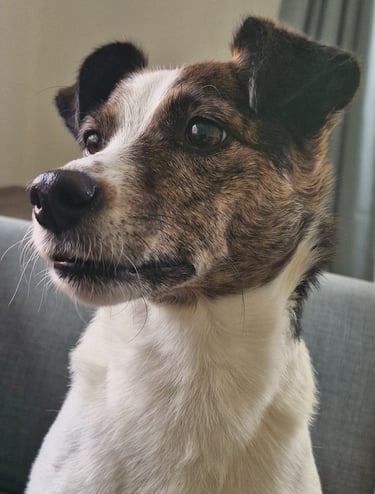
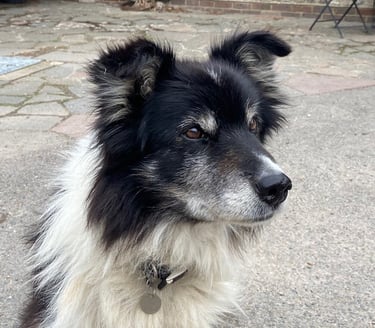
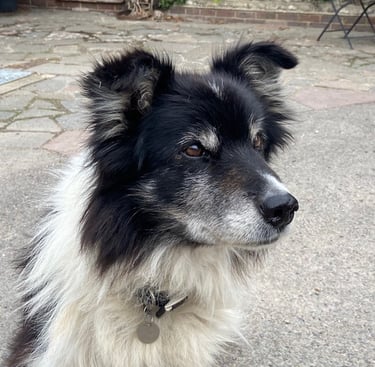
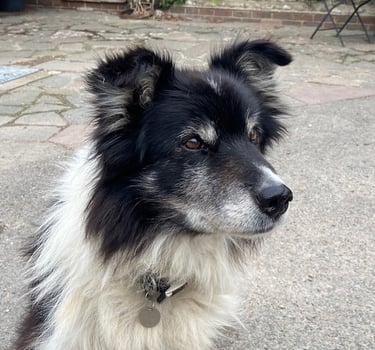
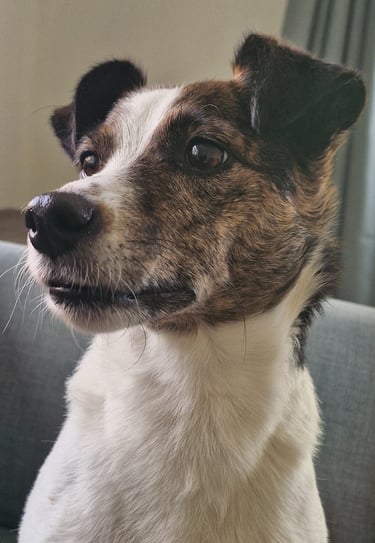
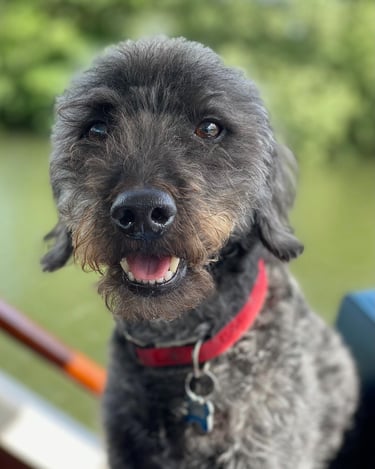
It's so much better if the photo is taken at eye level because it can capture the unique connection between you and your pet, especially if they're looking directly at the camera, although that's not crucial. These photos worked really well, even though the subjects weren't looking directly at the camera - they were pretty much at eye level though.

The other reason for being on eye level with your pet is that it ensures the facial features aren't distorted - a photo taken from above can make the nose seem out of proportion.
When I'm approached by someone to draw their pet and they ask what sort of photos I need, I hear myself saying "it doesn't matter, just send me your favourite ones" !
But of course it does matter and here's why:
I owe it to the client to produce my best work and my best work is more likely to be achieved if I have a good photo to work from. That's not to say I can't work from poorer quality photos (in fact, I quite enjoy the challenge of producing a drawing which is better than the photo I'm working from) but there are certain things which can help make a good reference photo.
Of course, sometimes there is only one photo - not because you only have one photo of your pet (we all know that's highly unlikely!). It's because there is only one photo - THE photo, the one which means more to you than any of the others you have and it can be THE photo for multiple reasons. If there is only "one" photo, that's absolutely fine and that's the we will use.
If, however, you need advice about taking a photo or selecting from your existing photos, I hope this guide will help you.
If you don't like detail, this is all you need to know!
Take the photo in good natural lighting, not strong sunlight (a bright overcast day is ideal)
Be on eye level with your pet
Face on or side on work equally as well
Make sure the eyes are sharp and in focus - the personality often shines through in the eyes
Be as close as possible to your pet
The higher the resolution the better - if you zoom in and can't see details, neither can I !
Make sure the colour in the photo accurately reflects the colour of your pet's coat
Send as many photos as you like!
Examples of good photos can be found here - jump to the last page!
Now you know what I do with the photos, what will make a good one? Read on to find out. . . . .
Get Close!
Try and get as close as you can when taking a photo - use toys, treats or whatever it takes! The further away you are, the more detail will be lost when I zoom in and crop the photo.
Good Detail
This may be obvious but the photos must be sharp and in focus! I don't know your pet and a photo you've taken which may be a bit blurry or taken from a long way away could leave me with lots of questions. I use my iPad to work from when I'm drawing a portrait and zoom in A LOT !! The fur on an animal's face is shorter in some places, longer in others and it changes direction all over the place! Also there are often subtle changes in colouring and markings. If I can't see these details when I zoom in, I have to do a bit of guesswork.
Coat Colour
Please check the photos to make sure that the photos you're sending accurately reflect the colour of your pet's coat. Taking photos in good natural light (but not strong sunlight) can help with this.
The More the Merrier!
I'm really happy for you to send me as many photos as you like.
I really hope this has helped. I also have a downloadable information sheet with examples of good (and not to good!) reference photos.
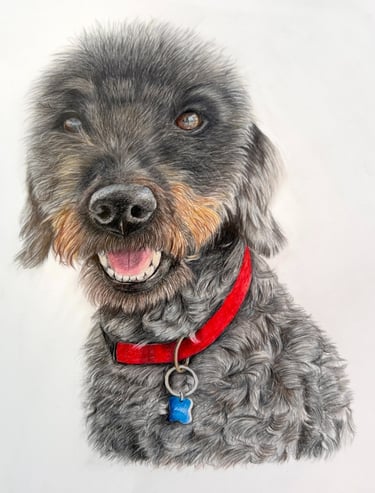
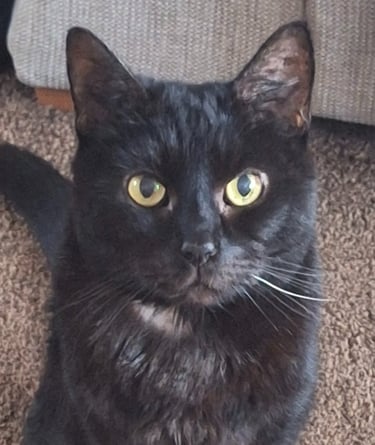
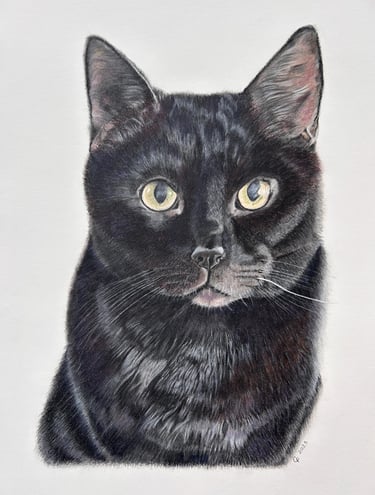
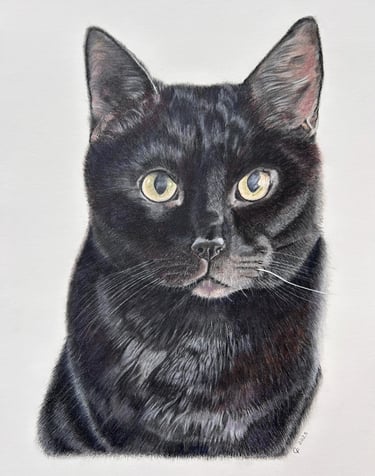
Black Animals
I just want to quickly mention black animals. People so often say there's no point drawing my dog/cat, he's just black! Let me just say, they are never "just black" - in fact black is not the first colour I reach for when drawing a black animal!

Permission
Just a quick not about permission - If you haven't taken the photo yourself, you must have permission from the photographer for me to use the photo!
Not sure whether your photo will work? Email me two or three or your favourites and I'll happily let you know which would make the strongest portrait - there's no obligation!
Thoughts?
I'd love to know what you thought!
If you have a minute, please submit your response below and if there are any topics you would like covered please contact me.